|
How to view images in
PIE
By: Dave
- November 4th, 2001
Though your device might not have specific picture viewing software, you can view the images in Pocket Internet Explorer. This little trick requires you to setup a small web server on your PDA, and then use the directory browsing function to access your pictures. It is really very easy to setup, and is quite a good way to easily view your pictures on your PDA.
**Note, I recommend if you have a network card for your PDA, you have it handy and do some of the configuration on the web server from your desktop. However, you will need to know the IP address of your PDA in order to make this work **
-
Download "SQLDash". Why you ask? No, you really don't need the SQLDash program, but it does include the Windows CE Web Server cab files.
-
Extract SQLDash. It should just extract itself, but you can use WinZip to do it if you would like.
-
The sqldash directory should now be created. Open that, and then there should be another sqldash directory. Inside that will be a folder named PPC, open that as well. (Basically, navigate to the
qldash\SQLDash\PPC directory).
-
There will be a program named PPCSetup.exe. You don't want to run this, but instead extract in. If you have WinZip installed, do this by right clicking and dragging the PPCSetup program. When you let go of the right mouse button, choose Extract to folder.
-
Now open the folder that was created. The three main files you need to look at are httpp300.ARM.cab, httpp300.SH3.cab, and httpp300.MIPS.cab. You will notice there is one for each Windows CE 3.0 processor
types.
-
Connect your PDA to your computer, and open a connect to your device. (You just need active sync to be running so you can use the explore function.) Click on Explore. Copy the httpp300.*.cab file to somewhere on your device. (* designates the processor, just copy one. Also, note where you put the cab file. I would just put it in My Documents.)
-
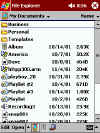
Disconnect your PDA from your computer (not required) and use File Explore to navigate to the location of the file you just copied. Run the file (tap it). The installer will run and install the Windows CE Web Server.
-
Windows CE Web Server should now be on your device. Do a soft reset. This will reboot your device and the CE Server. The Server should start automatically, but if it doesn't, run vishttpd (in the start menu), and click the start button.
Ok. Now your CE Web Server is ready to handle your picture directory. If you want to make it extremely simple on yourself, make a directory called "pictures" in the \windows\www\wwwpub\ folder on your device. Put all your pictures here. Then you can skip down to step 17. If you have a network card for your PDA, and you know the IP address of your
device (you could probably also use your devices name), I prefer to modify my web server settings from my desktop. If that is the case, use IE on your desktop instead of PIE on your PDA in steps 9 through 17. When I use the term "localhost", change that to the IP address of your device (until step 17)
-
Using Pocket Internet Explore (PIE), go to the following URL:
"https://localhost/"
-
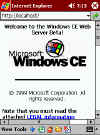
You should now see your web servers main index page (homepage). Scroll down and click on the "Administer the web server" link. (or
"https://localhost/Admin)".
-
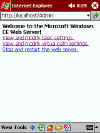
You now will have three options. You want to choose "View and modify virtual path settings".
-
A chart will appear on the screen (appears better on a desktop computer). Scroll to the box that says, "Add new virtual path". In this box, write something like "/pictures" or "/pics" (no quotes). This will be the address you will go to in PIE to get to your pictures. From now on, I will be using /pictures, but you can have this be almost anything you want.
-
Scroll to the right. In the box that says "Add new physical path", change that to be the location of your pictures. In my case, I have a folder in my root directory of my device called pictures. For me, I would enter "\pictures" (no quotes) in this box. You might have your pictures in "\My Documents\pictures". If so, put that here.
-
Scroll further to the right. The next box should say Public, then the next three radio buttons should by check in the Yes position. (You can change all these settings later if you wish to secure your device.)
-
Finally, click Add.
-
The new virtual directory will be added. The CE Web Server now needs to be restarted. I have found that simply restarting it doesn't work. I recommend doing a soft reset here.
-
Run PIE, and navigate to the following URL: https://localhost/pictures/ (note, if in step 12, you didn't enter "/pictures", change the URL accordingly. For instance:
">https://localhost/pics/)"
-
You now should receive a directory listing of files. You will probably need to scroll to the right to find the names. Tap the links to see the pics!
Screenshots
 |
 |
 |
 |
| Run hhtpp.*.cab
from your device through File Exploere. |
The CE
Server will look like this in PIE. |
Three
options for administrative purposes. |
Virtual
Directory Settings. |
| ~ |
 |
 |
|
|
| Directory
Browsing in my pictures directory |
Open
picture in PIE. Looks just like what it would via the
Internet. |
|
|
First eight steps overviewed in "Pocket IIS And A Wireless Network For An iPaq"
which is located at www.angrycoder.com
|

